

Are you looking to level up your television viewing experience using Internet Protocol Television (IPTV) right on your Android device? Or perhaps you’re enthusiastic about exploring the myriad possibilities offered by IPTV, perfect! This article, written in an engaging and informative voice, is custom-designed for you. In this guide, we’ll walk you through the process of setup IPTV on your Android device using the Smarters Pro app.
IPTV, short for Internet Protocol Television, is a broadcasting method that delivers television programming via the internet. Unlike traditional cable or satellite connection, IPTV allows you to stream your favorite content on-demand, right from your Android device, and Smarters Pro is an excellent app providing this service.
Let’s dive into the step-by-step guide on how to setup IPTV on your Android device using Smarters Pro:
The first step is to access the Google Play Store on your Android device. Once you’re in the store, follow these steps:
After the app is successfully downloaded, you’ll need to install it:
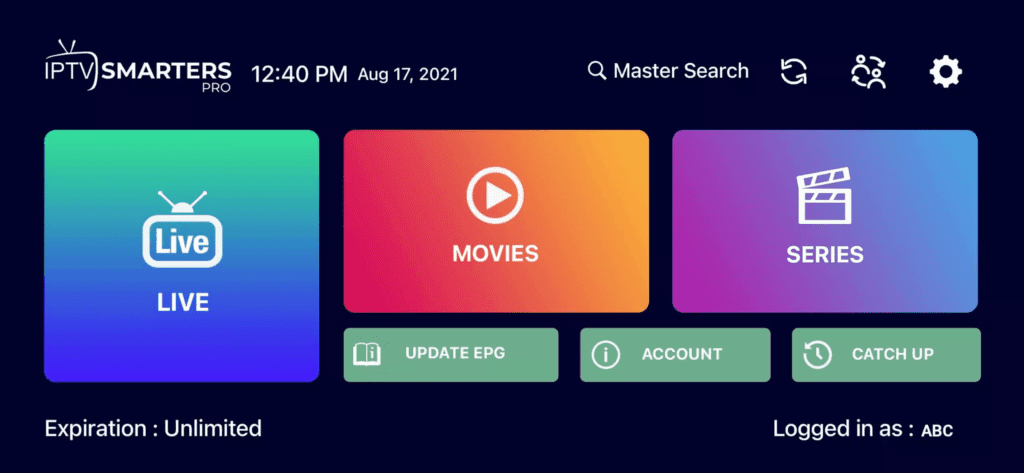
Once you’ve entered your IPTV details, you’ll find yourself within the Smarters Pro interface. Here’s a quick overview:
Live TV: Access your live TV channels.
Movies: Browse and watch on-demand movies.
Series: Explore TV series available through your IPTV service.
Catchup: If your service includes catch-up functionality, you can watch previously aired content.
EPG: The Electronic Program Guide displays schedules for your channels.
IPTV Smarters Pro allows you to customize your channel list. To do this:
With IPTV Smarters Pro set up on your Android device, you’re ready to enjoy a world of entertainment. Navigate through your channels, explore on-demand content, and take advantage of the app’s features.
Pro Tip: Consider using a VPN for privacy and security while streaming IPTV content on your Android device.
Setting up IPTV on your Android device using Smarters Pro is a straightforward process. With this app, you can enjoy the convenience of IPTV on your terms. Explore the channels, catch up on missed shows, and access on-demand content effortlessly.
If you’re an Apple device user and want to enjoy the world of IPTV (Internet Protocol Television), you can do so with the IPTV Smarters Pro app. This user-friendly guide will walk you through the setup process to get IPTV up and running on your iPhone, iPad, or Apple TV.
After the app is successfully downloaded, you’ll need to install it:
Once you’ve entered your IPTV details, you’ll find yourself within the Smarters Pro interface. Here’s a quick overview:
Live TV: Access your live TV channels.
Movies: Browse and watch on-demand movies.
Series: Explore TV series available through your IPTV service.
Catchup: If your service includes catch-up functionality, you can watch previously aired content.
EPG: The Electronic Program Guide displays schedules for your channels.
IPTV Smarters Pro allows you to customize your channel list. To do this:
With IPTV Smarters Pro set up on your Apple device, you’re ready to enjoy a diverse range of content. Navigate through your channels, explore on-demand shows and movies, and make the most of the app’s features.
Pro Tip: For added privacy and security while streaming IPTV content on your Apple device, consider using a VPN.
Setting up IPTV on your Apple device using IPTV Smarters Pro is a straightforward process. Now you can immerse yourself in the world of IPTV entertainment on your iPhone, iPad, or Apple TV. Explore the channels, catch up on missed programs, and access on-demand content with ease.
Even though IPTV Smarters is listed on Google Play Store and Apple App Store for Android and iOS mobiles respectively, Amazon Store does not host it. Therefore, if you want it on your FireStick, you will need to sideload it.
To sideload any app on your device, you should have the option Apps from Unknown sources enabled or turned on. So, let’s take care of this part first before we install IPTV Smarters on FireStick:
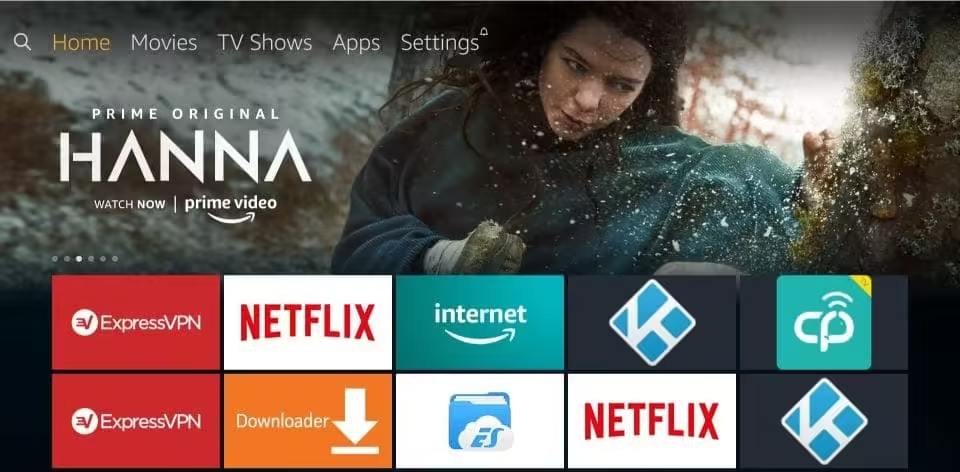
– On the home screen of your FireStick, you will find the menu bar on the top
In the menu bar, select Settings
– In the Settings, choose the option My Fire TV
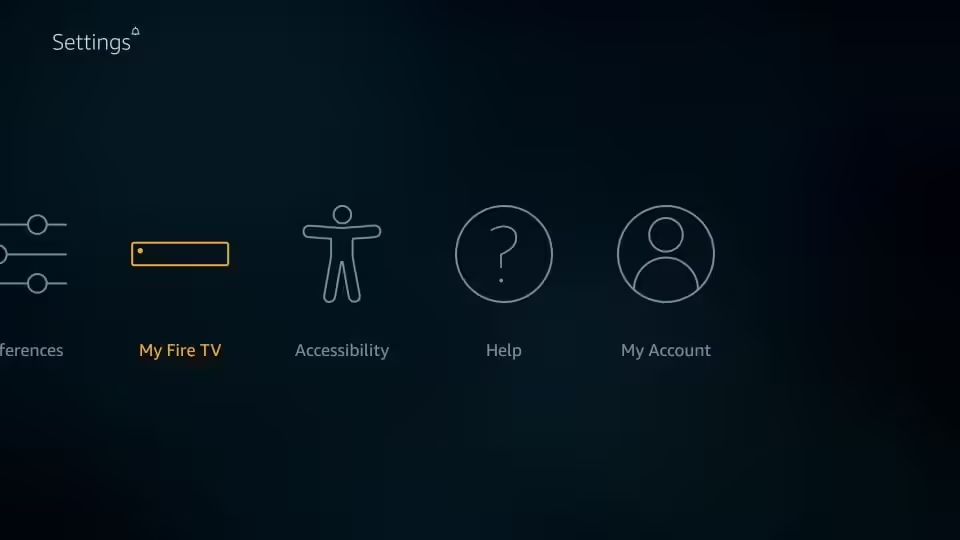
– When the following set of options are displayed on the next screen, click Developer Options
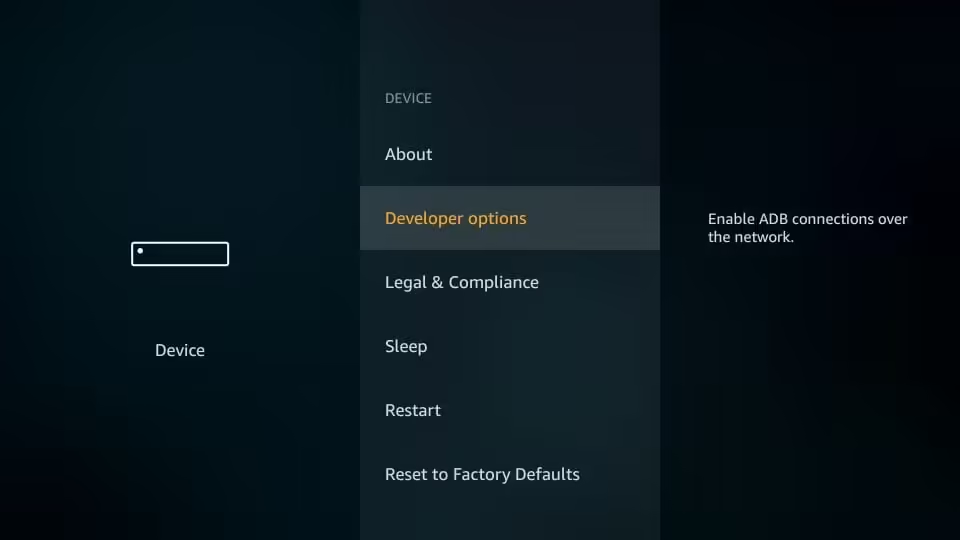
– Now, you need to check whether Apps from Unknown Sources is OFF or ON
Click it once if it is OFF
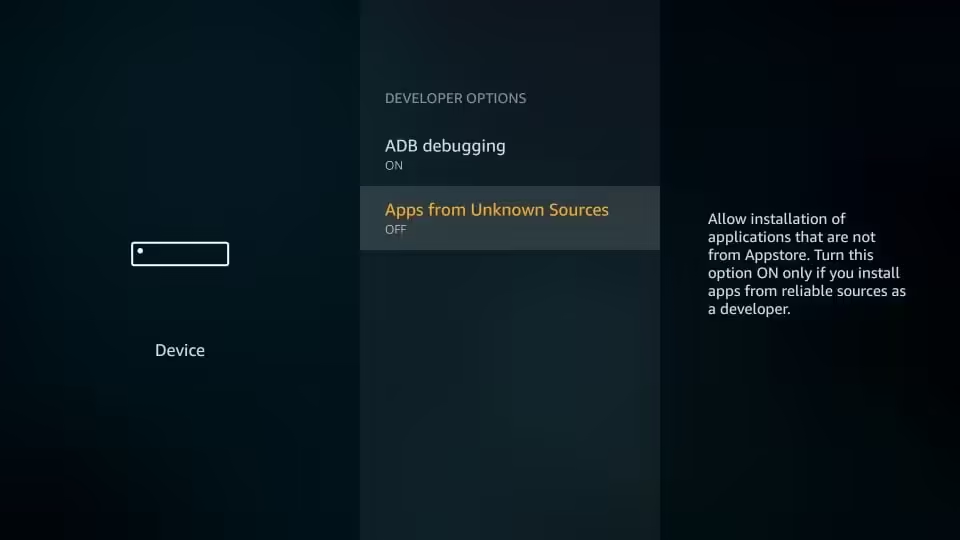
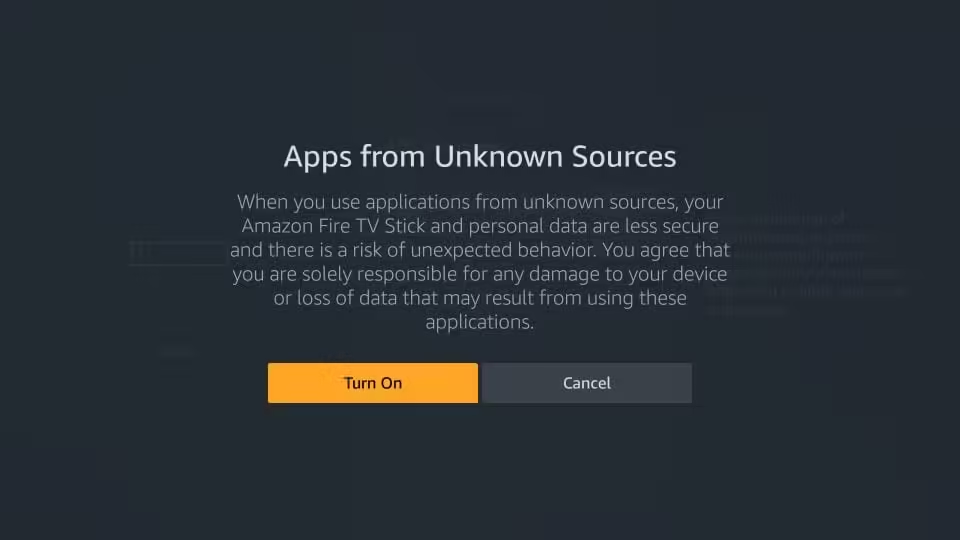
– A quick warning message is displayed
To keep Apps from Unknown Sources switched on, click Turn on
With this, you have configured the FireStick settings to allow the installation of IPTV Smarters and other third-party apps. Follow the steps below:
We will first install the Downloader app
This app will help you sideload IPTV Smarter on FireStick (because browser downloads are not allowed)
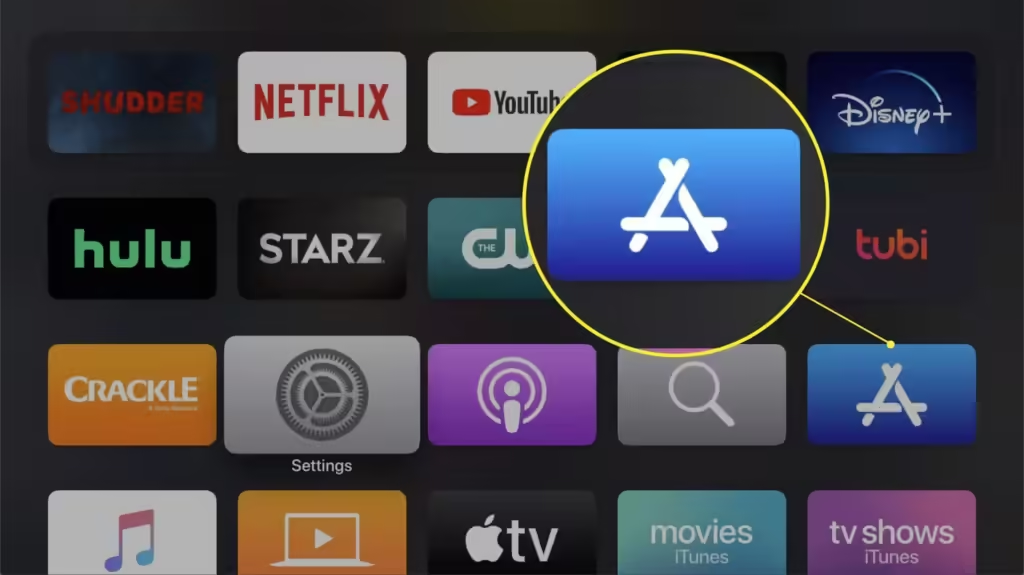
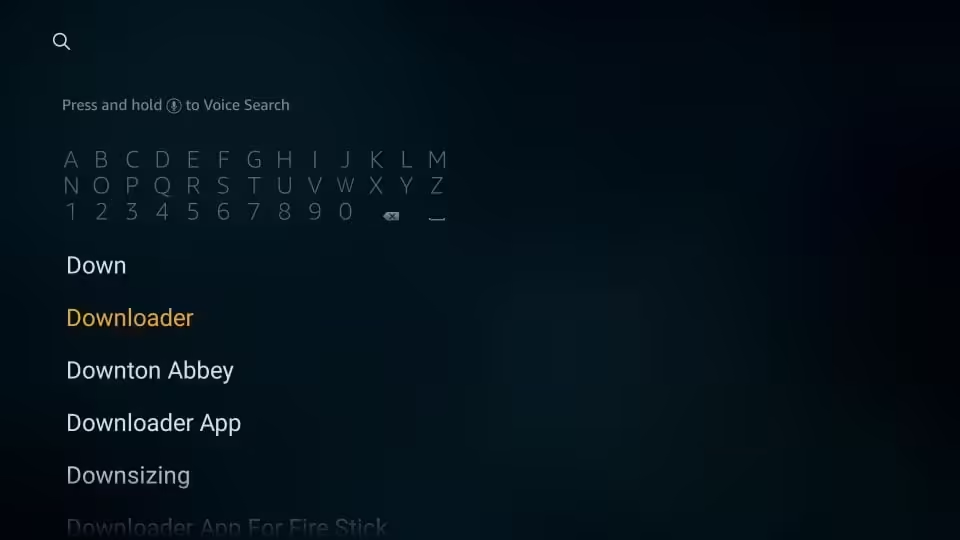
Highlight the Search option on the home screen of FireStick
Type the name of the app (which is Downloader)
Click the Downloader option when it is displayed in the search results
Choose the Downloader icon on the following screen and download and install the app
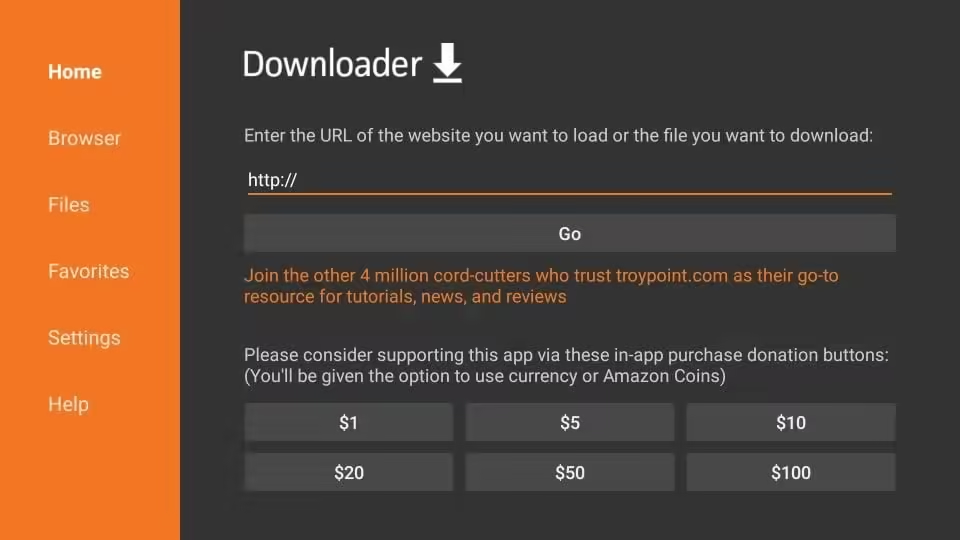
You may now open the Downloader app
When you run this app for the first time, a set of prompts will appear. Dismiss them until you see the following screen
On this screen, you need to click the URL textbox on the right side (make sure the Home option in the left menu is selected) where it says ‘http://’
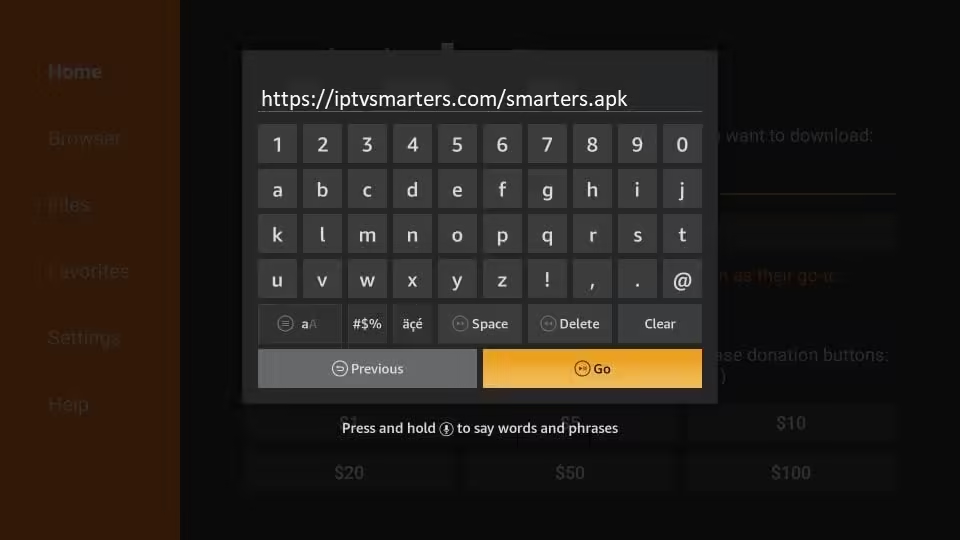
Go ahead and enter the following path on this window: https://iptvsmarters.com/smarters.apk
Click GO
Give it a minute or two until the IPTV Smarter is downloaded onto your FireStick device
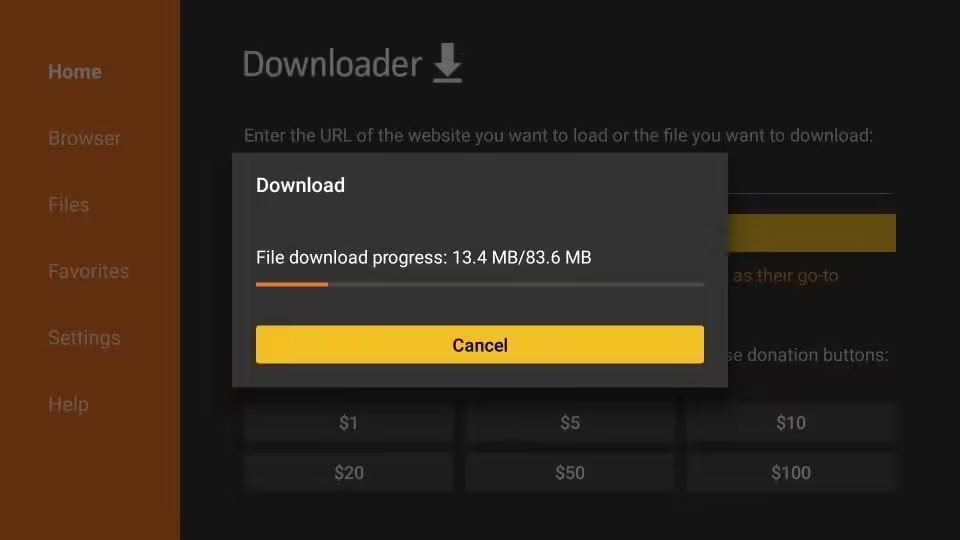
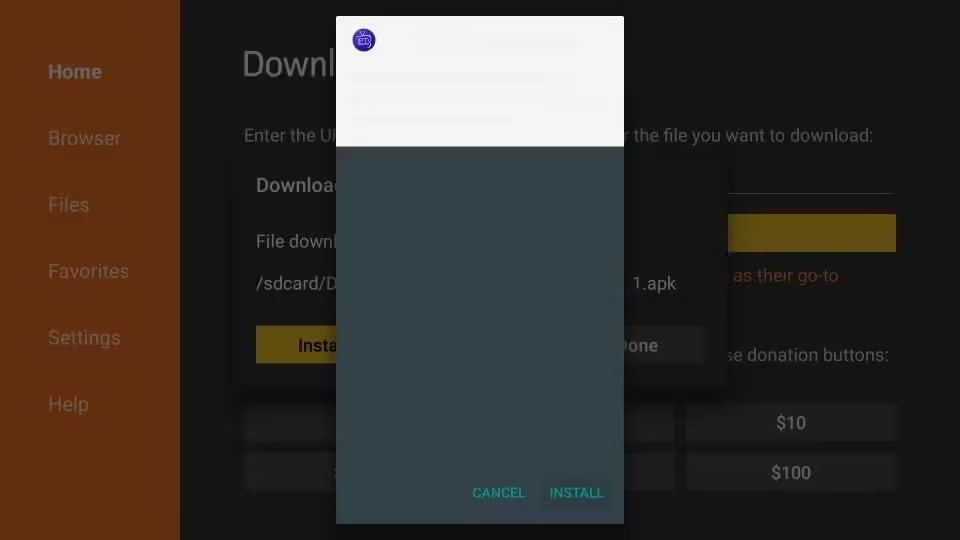
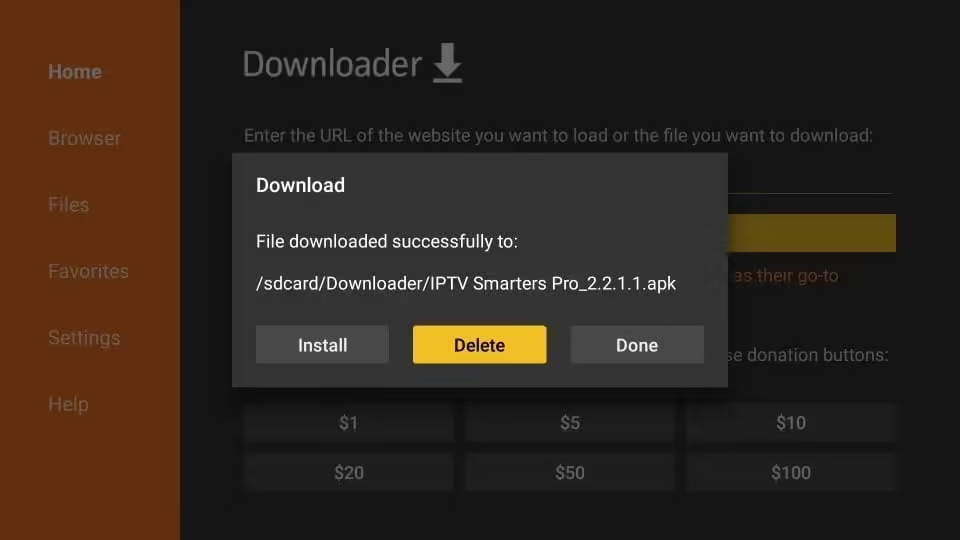
When the download has completed, the Downloader app will run the APK file and the installation will start
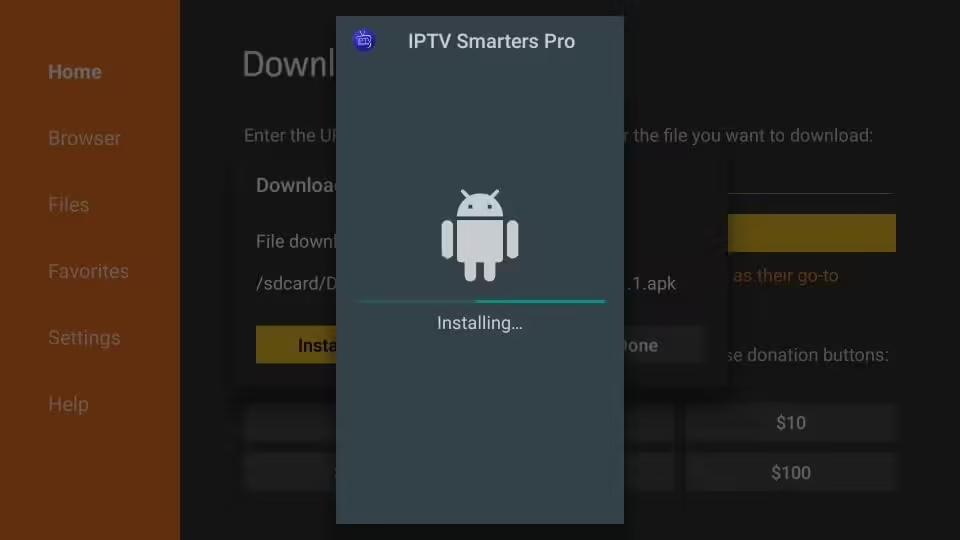
Click Install
Wait for the installation to finish
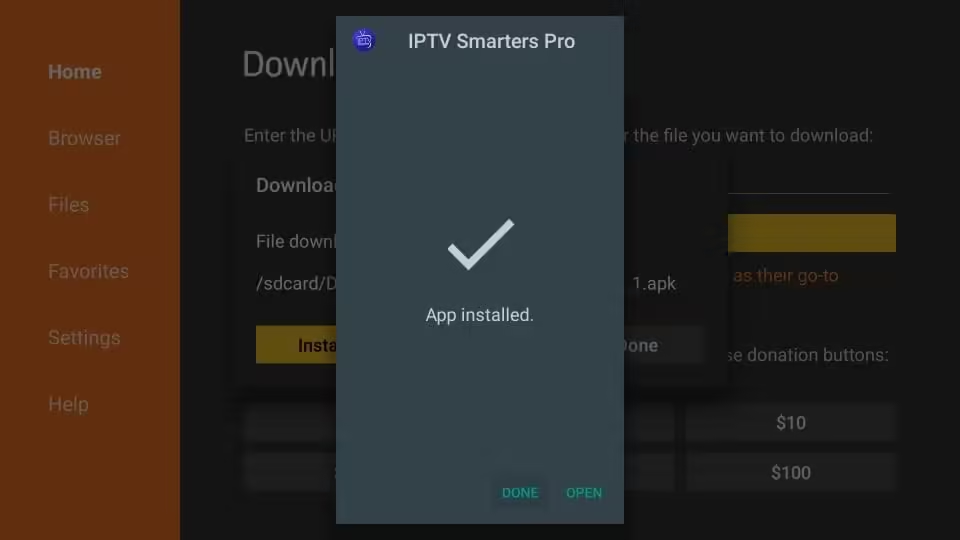
Installation is concluded with the App installed notification
You may now choose to click OPEN and get started with IPTV Smarters
I recommend choosing DONE so that you may first delete the APK file and save some space on the FireStick storage
If you clicked DONE above, you will be back on the Downloader interface
Click Delete
Again, click Delete
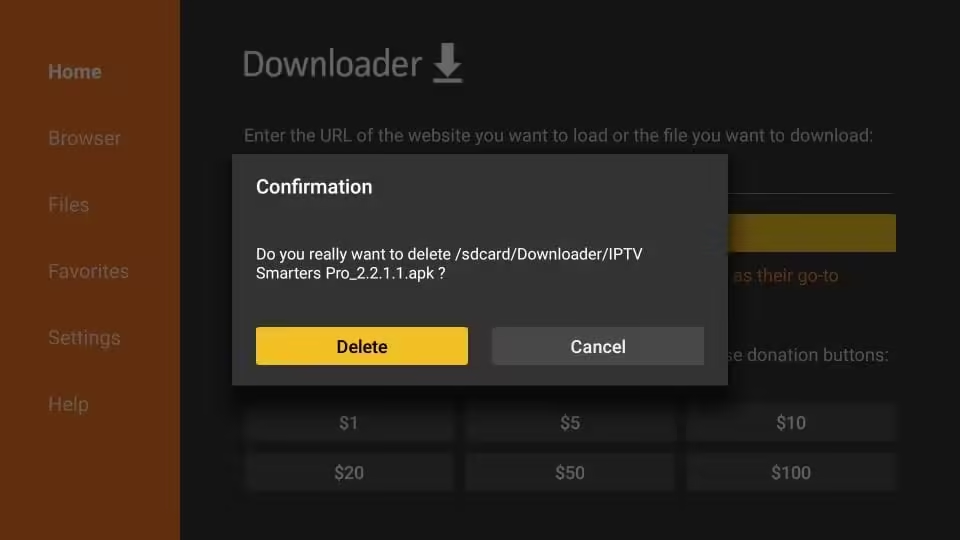
Great! You now have the IPTV Smarters app on FireStick.
When you run the IPTV Smarters app for the first time, Terms of Use will be the first window. Scroll down and click Accept.
We recommend setup IPTV via Xtream Codes API because you will have the Catchup feature this way and also do not need to add any EPG URL (it will load automatically).
Open the app once downloaded and click on “Add user” then click on “Login with Xtream Codes API“.
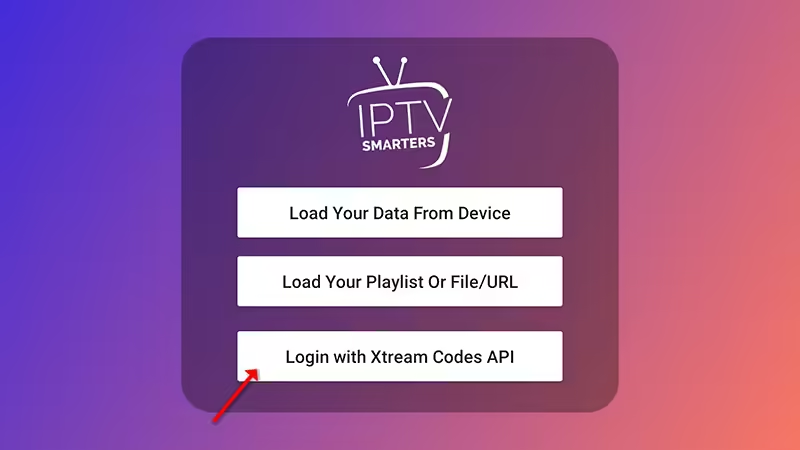
In this step, in the first box, select any name you want for example “IPTV SKY HUB”. On the second and third boxes, enter the “Username” and the “Password” and the server URL that we sent you via Whatsapp or Email or Chat
Now Click on “ADD USER” to proceed to the next section.
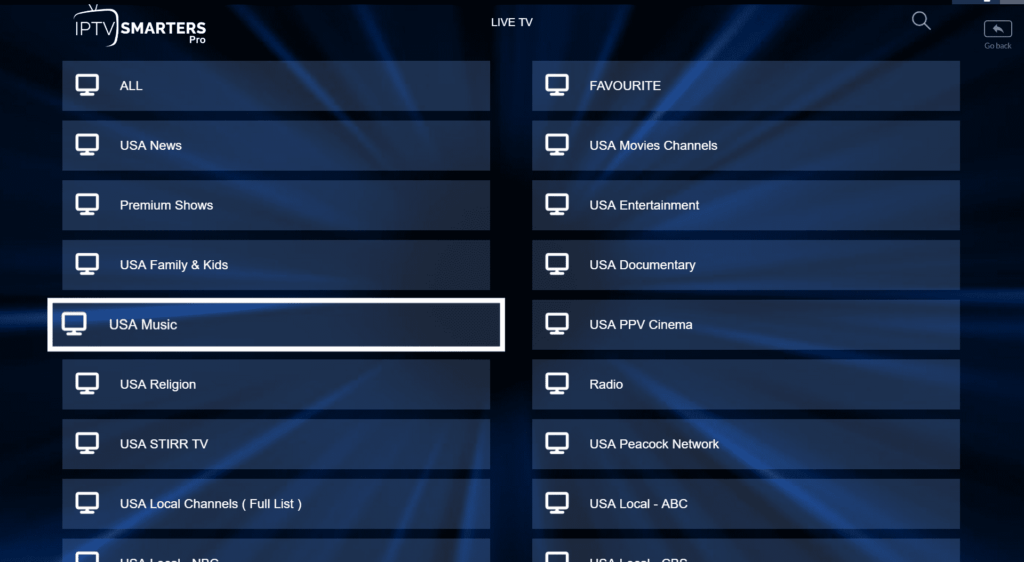
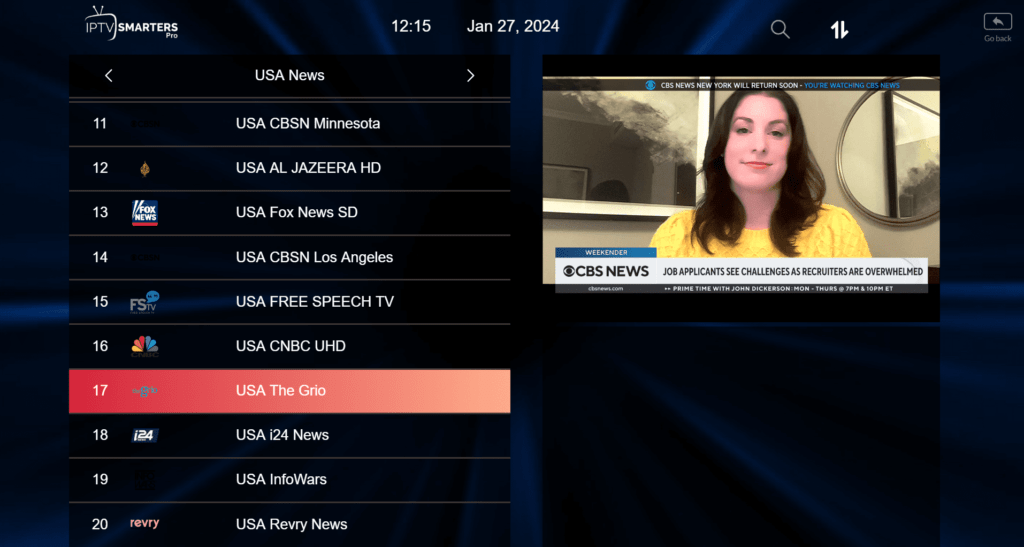
Now click on the “Live TV” icon as depicted in the image via a red arrow.
Now you must select the channel group that you want to watch and proceed to the next section.
And you must click on the channel name and then double click on the small screen to turn into the full screen as the final step.
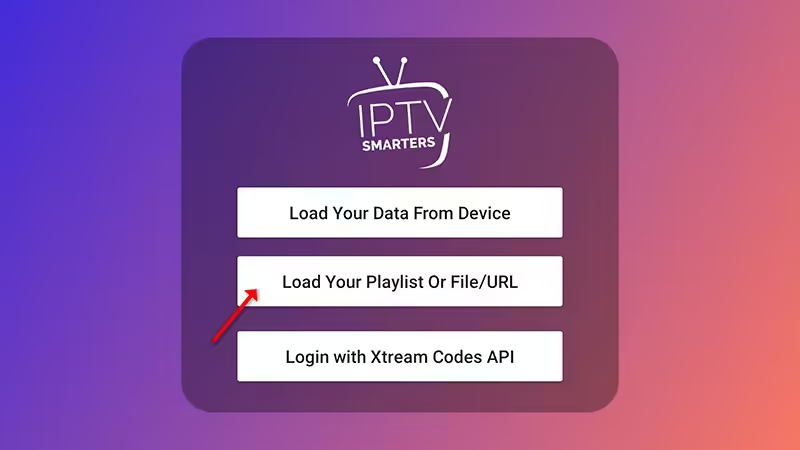
If you don’t have an Xtream Code API, you can setup iptv use an M3U URL and choose to Load Your Playlist or File URL.
Open the app once downloaded and click on “Add user” then click on “Login with Playlist“.
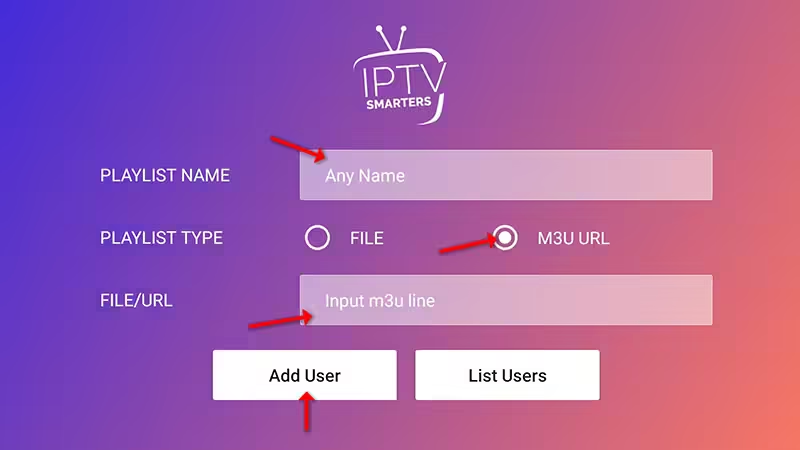
In this step, in the first box, select any name you want for example “IPTV SKY HUB”.
Select “M3U URL” and enter the M3U URL that we sent you via Whatsapp or Email or Chat.
Step 1: You can download SetIPTV / NetIPTV / Smart IPTV … from your TV store on Samsung, LG …
Step 2: After the installation, open the app the you will find MAC Address on screen
EX
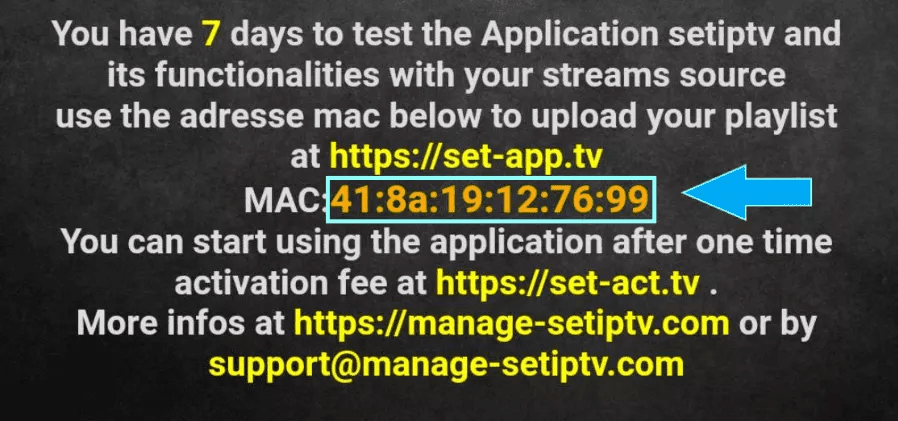
Step 3: Send us the MAC address via Whatsapp/Email/Live Chat
Step 4: After few minutes, restart/reboot your TV and Open the app Done
Are you looking to enjoy IPTV services on your computer running Windows or macOS? Look no further than IPTV Smarters Pro, a popular IPTV player that offers a user-friendly interface and seamless streaming experience. In this guide, we’ll walk you through the simple steps to install and setup IPTV Smarters Pro on your PC or Mac.
Start by opening your preferred web browser on your computer.
Once on the website, navigate to the “Downloads” or “Download Now” section.
Choose the appropriate version of the app for your operating system. IPTV Smarters Pro provides dedicated apps for both Windows and macOS. Click on the download link for your chosen version.
After the download is complete, open the downloaded file to initiate the installation process.
Follow the on-screen instructions to install the IPTV Smarters Pro app on your computer.
Launch the IPTV Smarters Pro app after installation.
Upon opening the app, you’ll be prompted to enter your IPTV subscription details. This typically includes a username, password, and the URL provided by your IPTV SERVICE PROVIDER
Enter this information accurately to access your IPTV content.
With your subscription details entered, you now have access to your favorite live TV channels, on-demand content, and other features within the IPTV Smarters Pro app.
Take some time to explore the user-friendly interface, browse channels, and enjoy your IPTV service on your Windows or macOS computer.
SETUP IPTV Smarters Pro on your computer opens up a world of entertainment possibilities, allowing you to watch your favorite content without the need for additional hardware. Whether you’re running Windows or macOS, this versatile IPTV player is designed to enhance your viewing experience.
STB Emulator Setup Instructions:
Troubleshooting STB Emulator
If you have any problems viewing the Channels please follow this recommended fix:
Restart your App, Device/Box, and Wi-Fi Router.
In case you are facing any issues, please contact our support team on WhatsApp and they will help you set the subscription in your APP.
In case you are facing any issues, please contact our support team on WhatsApp and they will help you set the subscription in your APP.

WhatsApp us